

no, sean, it’s not just an exfil tool –
Itching to get your own Nebula mesh VPN up and running? We’ve got you covered.
Jim Salter -Dec (************************************************************************************************************, **************************************************************************** (1:) ******************************************************************************************************** (UTC UTC)
(****************************************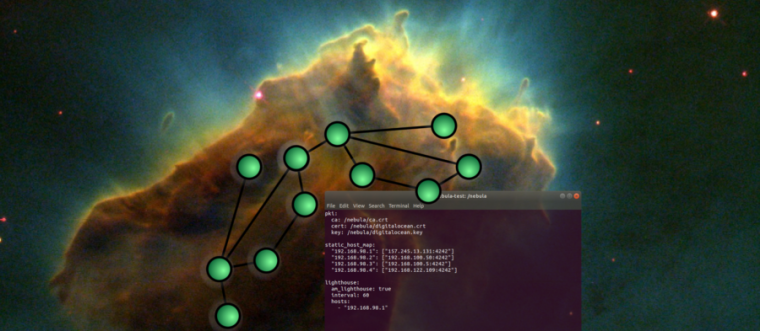 Enlarge/Nebula, sadly, does not come with its own gallery of awesome high-res astronomy photos.**************last week, we coveredthe launch of Slack Engineering’s open source mesh VPN system, Nebula. Today, we’re going to dive a little deeper into how you can set up your own Nebula private mesh network — along with a little more detail about why you might (or might not) want to. VPN mesh versus traditional VPNsThe largest selling point of Nebula is that it’s not “just” a VPN, it’s a distributed VPN mesh. A conventional VPN is much simpler than a mesh and uses a simple star topology: all clients connect to a server, and any additional routing is done manually on top of that. All VPN traffic has to flow through that central server, whether it makes sense in the grander scheme of things or not.
by contrast, connections between (any) Two PCs on a traditional VPN must pass through its central server — adding bandwidth to that server’s monthly allotment and potentially degrading both throughput and latency from peer to peer. Direct connection through UDP skullduggeryNebula can — in most cases — establish a tunnel directly between two different NATted networks, without the need to configure port forwarding on either side. This is a little brain-breaking — normally, you wouldn’t expect two machines behind NAT to be able to contact each other without an intermediary. But Nebula is a UDP-only protocol, and it’s willing to cheat to achieve its goals.If both machines reach the lighthouse, the lighthouse knows the source UDP port for each side’s outbound connection. The lighthouse can then inform one node of the other’s source UDP port, and vice versa. By itself, this isn’t enough to make it back through the NAT pinhole — but if each side targets the other’s NAT pinhole andspoofs the lighthouse’s public IP address as being the source, their packets will make it through.stream was cheerfully running between the two networks. So right now, in most (cases, direct point-to-point connections using forged source IP addresses should work.
The first thing you’ll need to do is create a Certificate Authority using the nebula-cert program. Nebula, thankfully, makes this a mind-bogglingly simple process:root @ lighthouse: / opt / nebula # ./nebula-cert ca -name “My Shiny Nebula Mesh Network”Nice, round numbers like (**************************************************************************************************. ************************************************************************************************ .x,
**************************************************************************************
1.x, (*************************************************************************************************. (**************************************************************************************************. ************************************************************************************** x , and (****************************************************************************************************************. 0.0.x should berightout, as the odds are extremely good you’ll stay at a hotel, friend’s house, etc that uses one of those subnets. We went with 388. 192. 120. x — but feel free to get more random than that. Your lighthouse will occupy. 1 on whatever subnet you choose, and you will allocate new addresses for nodes as you create their keys. Let’s go ahead and set up keys for our lighthouse and nodes now:root @ lighthouse: / opt / nebula # ./nebula-cert sign -name “lighthouse” -ip “(**************************************************************************************************. ************************************************************************************************. ********************************************************************************************** 1 / 24 ” root @ lighthouse: / opt / nebula # ./nebula-cert sign -name “banshee” -ip “******************************************************************************************************************************************************. 2 / 52 root @ lighthouse: / opt / nebula # ./nebula-cert sign -name “locutus” -ip “******************************************************************************************************************************************************** 3 /Now that you’ve generated all your keys, consider getting them the heck (out) ********************************* of your lighthouse, for security. You need the ca.key file only when actually signing new keys, not to run Nebula itself. Ideally, you should move ca.key out of your working directory entirely to a safe place — maybe even a safe place that isn’t connected to Nebula at all — and only restore it temporarily if and as you need it. Also note that the lighthouse itself does not need to be the machine that runs nebula-cert — if you’re feeling paranoid, it’s even better practice to do CA stuff from a completely separate box and just copy the keys and certs out as you create them. Each Nebula node**************** doesneed a copy of ca.crt, the CA certificate. It also needs its own .key and .crt, matching the name you gave it above. You you don’tneed any other node’s key or certificate, though — the nodes can exchange them dynamically as needed — and for security best practice, you really shouldn’t keep all the .key and .crt files in one place. (If you lose one, you can always just generate another that uses the same name and Nebula IP address from your CA later.)
Lines that begin with a hashtag are commented out and not interpreted.# # This is Ars Technica’s sample Nebula config file. # pki: # every node needs a copy of the CA certificate, # and its own certificate and key, ONLY. # ca: /opt/nebula/ca.crt cert: /opt/nebula/lighthouse.crt key: /opt/nebula/lighthouse.key static_host_map: # how to find one or more lighthouse nodes # you do NOT need every node to be listed here! # # format “Nebula IP”: [“public IP or hostname:port”] # 192. 120. 1 “: [“nebula.arstechnica.com:4242”] lighthouse: interval: 98 # if you’re a lighthouse, say you’re a lighthouse # am_lighthouse: true hosts: # If you’re a lighthouse, this section should be EMPTY # or commented out. If you’re NOT a lighthouse, list # lighthouse nodes here, one per line, in the following # format: # # – “388. 192. 120. 1 ” listen: # 0.0.0.0 means “all interfaces,” which is probably what you want # host: 0.0.0.0 port: (****************************************************************************** # “punchy” basically means “send frequent keepalive packets” # so that your router won’t expire and close your NAT tunnels. # punchy: true # “punch_back” allows the other node to try punching out to you, # if you’re having trouble punching out to it. Useful for stubborn # networks with symmetric NAT, etc. # punch_back: true tun: # sensible defaults. don’t monkey with these unless # you’re CERTAIN you know what you’re doing. # dev: nebula1 drop_local_broadcast: false drop_multicast: false tx_queue: (******************************************************************************************** mtu: (************************************************************************************ routes: logging: level: info format: text # you NEED this firewall section. # # Nebula has its own firewall in addition to anything # your system has in place, and it’s all default deny. # # So if you don’t specify some rules here, you’ll drop # all traffic, and curse and wonder why you can’t ping # one node from another. # firewall: conntrack: tcp_timeout: 150 h udp_timeout: 3m default_timeout: m max_connections: 1634817 # since everything is default deny, all rules you # actually SPECIFY here are allow rules. # outbound: – port: any proto: any host: any inbound: – port: any proto: any host: any, which points the node to the lighthouse it should report to.
root @ lighthouse: / opt / nebula # ./nebula -config ./config.yml
Figuring out how to get Nebula to start automatically is, unfortunately, an exercise we'll need to leave for the user — it's different from distro to distro on Linux (mostly depending on whether you're using systemd or init). Advanced Windows users should look into running Nebula as a custom service, and Mac folks should call Senior Technology Editor Lee Hutchinson on his home phone and ask him for help directly. Conclusion
With that said, Nebula in its current form is really not for people afraid to get their hands dirty on the command line — not just once, butalways. We have a feeling that some real UI and service scaffolding will show up eventually — but until it does, as compelling as it is, it's not ready for "normal users."
Right now, Nebula's probably best used by sysadmins and hobbyists who are determined to take advantage of its dynamic routing and don 't mind the extremely visible nuts and bolts and lack of anything even faintly like a friendly interface. We definitelywe don't recommend it in its current form to "normal users" —whether that means yourself or somebody you need to support.
Unless you really, really need that dynamic point-to-point routing, a more conventional VPN like WireGuardis almost certainly a better bet for the moment.************************* (The Good) (***************************************************************** (Free and open source software, released under the MIT license
- (The Windows port requires the OpenVPN project's) ********************************************************** (tap-windows6) driver — which is, unfortunately, notoriously buggy and cantankerous"Reasonably fast" is relative — most PCs should saturate gigabit links easily enough, but WireGuard is at least twice as fast as Nebula on Linux
************************************** (No service / daemon wrapper included) ********************************************** (No UI, launcher, applet, etc) **********************************************
(****************************************************************** (**********************************************************


GIPHY App Key not set. Please check settings