
Welcome to the future! Sometime ago, a #RetroArch bounty got posted proposing OCR (Optical Character Recognition) and Text To Speech services being added to RetroArch.
Some months later, and here we are – a bounty hunter valiantly took on the challenge and there is now a fully fledged AI Service up and running that works seamlessly with #RetroArch!
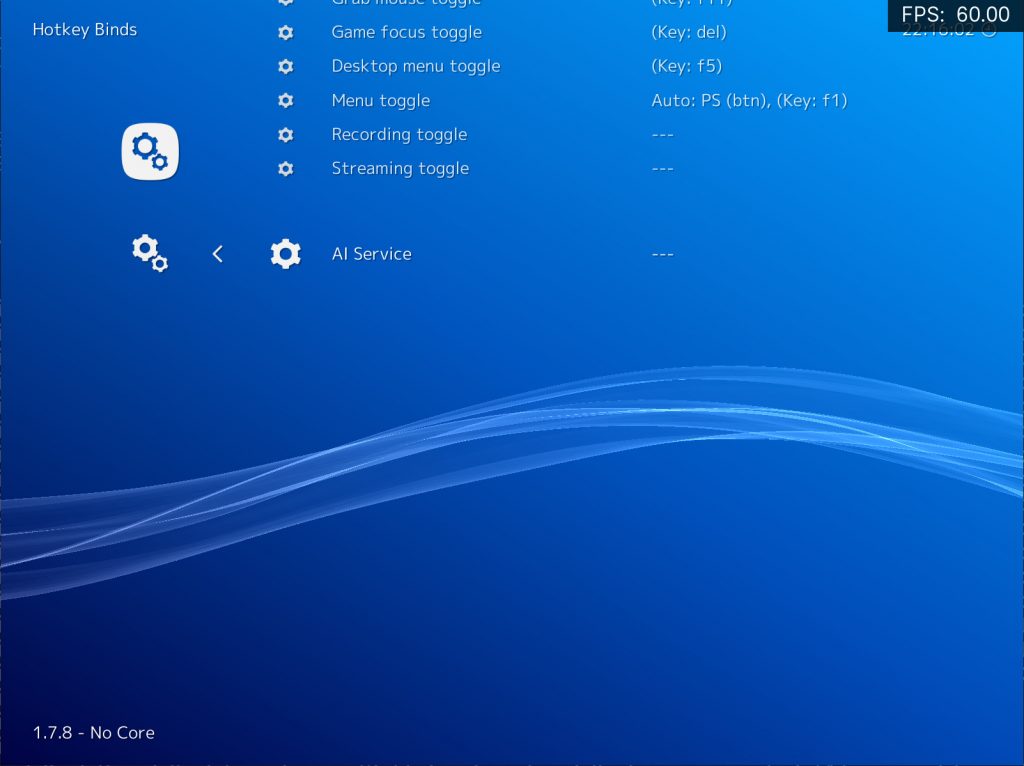
You use the AI Service like this – you enable the AI Service (should be enabled by default), you then setup the server URL (could be a local network address if you have the server up and running in your own network, or a public IP / URL in case you’re going through a service). After that, you only need to bind a button or key to the so-called “AI Service” action. You can bind this key by going to Settings – Input – Hotkeys.
In this video, you can see each of the two modes that the AI Service currently is capable of doing –
Speech Mode – Upon pressing the AI Service button, a quick scan is done of the text, and the recognized text is then translated to speech. You can press the AI Service button at any time and it will try to process the current snapshot of the screen it made. This mode is non-interruptable, meaning the game will continue running when you hit this button, and the output speech will take as long as it takes for the server to respond to your query and pipe the sound to RetroArch.
Image Mode – In image mode, it tries to replace the text onscreen with the output text. For instance, in the video you see above, the game is played in Japanese, so when we hit the AI Service button, it tries to replace the Japanese text with English translated text. This mode is interruptable – this means that when you hit the AI Service button, it pauses the game and shows you an image with the replacement text UNTIL you hit either the AI Service hotkey or the Pause hotkey again, then it will continue playing.
We encourage everybody that wants to submit feedback to us on this amazing revolutionary feature to go to our Discord channel and in specific the # retroarch-ai channel. We’d love to hear your feedback and we’d like to develop this feature further, so your input and feedback is not only appreciated but necessary!
1.0 Get a Google API key
- Create a billing account (taken fromhttps://cloud.google .com / billing / docs / how-to / manage-billing-account)
- Go to the Google Cloud Platform Console Manage billing accounts page and sign in or, if you don’t already have an account, sign Up.
- Click the Create account button.
- Enter the name of the billing account, then click Continue. Note that if you see an Organization drop-down, then you must also select an Organization before you can continue.
- You might be prompted to select your country. The choice will affect the payment options you have in the next step. The currency for your billing account is based on the country you select.
- Choose the payments profile that will be associated with this billing account. You can choose an existing payments profile, or create a new payments profile. If you choose to create, follow the instructions on the screen to set up your payments profile.
- Set your Account type as individual
- Create an API Key: (taken fromhttps://cloud.google.com/docs/authentication / api-keys)
- Navigate to the APIs & Services Credentials panel in GCP Console.
- Select Create credentials, then select API key from the dropdown menu.
- Click the Create button. The API key created dialog box displays your newly created key.
- This is your GOOGLE_API_KEY that we will use later.
2.0 Setup VGTranslate
- Windows:
- Download a release here:https: //ztranslate.net/download/vgtranslate_serve_v1.01 .zip? owner=
- Change the vgtranslate / vgtranslate / default_config.json file as follows:
-
{“local_server_ocr_key”::
”,“ server_host ”:“ ztranslate.net ”,“ default_target ”:“ En ”,“ server_port ”: 443, “local_server_host”: “localhost”, “local_server_port” : 4404, “Local_server_api_key_type”: “google”, “local_server_ocr_processor”: {}, “user_api_key”: “”, “local_server_translation_key”: “ ”,“ Local_server_enabled ”: true
} - rename default_config.json to config.json
- Run serve.exe.
- Linux:
- Download the vgtranslate project fromhttps://gitlab.com/spherebeaker/vgtranslate.gitor use git clone.
- Go to the extracted vgtranslate directory where setup.py is located.
- Using python2.7, run: python setup.py install -If this step fails, you can try removing the problematic dependency. Dependencies like gender-guess and kivy are not needed for most functionality. -Change the default_config.json file as in the windows case.
- Go into the vgtranslate subdirectory and run: python serve.py
3.0 Setup RetroArch
- Start RetroArch -Settings->Input->HotKey Binds->AI Service
- Change to key / button of your choice
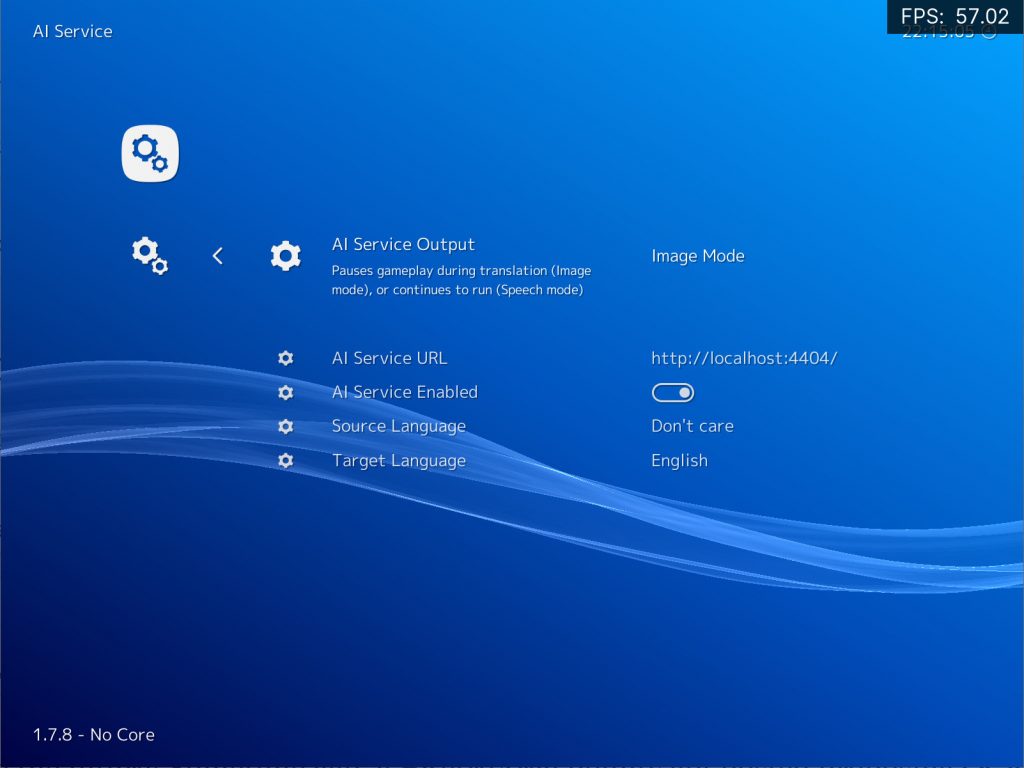
- Settings->AI Service -Set AI Service Output to “Image Mode” (text translation) –
OR set AI Service Output to “Speech mode” (text-to-speech) - Set AI Service URL to “http: // localhost: 4404 ”
- Set AI Service Enabled to on.
- Set Target Language to your language of choice
- Source language will be used as a hint for the OCR, but can be left to “Don’t Care”
- Run a game of your choice
- Image Mode (Text translation)
- Press your hotkey to pause the game, and wait for a translation to come back.
- Press your hotkey again to unpause and continue
- Speech Mode (Text To Speech)
- Press your hotkey to read out the text currently on the screen.
- Image Mode (Text translation)
ZTranslate API Key method
- Go to https://ztranslate.net/signup
- Enter a display name, email, and password, and click register
- Check your email for the verification link and click on it. If you don’t see it, check your junk / spam folder.
- In the top menu, click on “Settings”
- Copy the API KEY near the bottom of the page. This is your ZTRANSLATE_API_KEY.
- Follow instructions in 3.0, but
- For AI Service URL, put in: “http://ztranslate.net/service?api_key=
”
- For AI Service URL, put in: “http://ztranslate.net/service?api_key=
Follow instructions 2.0, 3.0, and 4.0, except:
- when modifying default_config.json, use the following:
{“local_server_ocr_key”: “”, “server_host”: “ztranslate.net”, “default_target”: “En”, “server_port”: 443, “local_server_host” : “Localhost”, “local_server_port”: 4404, “local_server_api_key_type”: “ztranslate”, “local_server_ocr_processor”: {}, “user_api_key”: “
”,“ local_server_translation_key ”:“ ”,“ local_server_enabled ”: true} - Change AI Service URL to “http: // localhost: 4404 ”.
- This will use the ztranslate API method, but will reduce latency compared to hitting the service API directly.


GIPHY App Key not set. Please check settings