

The purpose of this article is to support those interested in
deepening their engagement in scheduling development using
sched-ext.
We are currently working to better integrate all of this in the
major Linux distributions, but for now setting up a development
environment requires a few manual steps.
In this post, I’ll describe my personal workflow for conducting
experiments with sched-ext without the need to install a custom
kernel.
To test the sched-ext schedulers, we will use virtme-ng, a tool that
allows to quickly build and test custom kernels without having to deploy
them on a bare metal system or a dedicated virtual machine.
Install virtme-ng
virtme-ng is available in pretty much all the major Linux
distributions, so you should be able to install it via the package
manager of your distro.
Alternatively, you can either recompile, or even run directly, from
source or install it
via pip:
$ pip install --break-system-packages virtme-ngDependencies
Install the following dependencies to be able to compile a sched-ext
kernel and the user-space scx tools and schedulers:
 $ sudo apt -y install \
   bison busybox-static cargo clang-17 cmake coreutils cpio \
   elfutils file flex gcc git iproute2 jq kbd kmod libcap-dev \
   libelf-dev libunwind-dev libvirt-clients libzstd-dev llvm-17 \
   linux-headers-generic linux-tools-common linux-tools-generic \
   make meson ninja-build pahole pkg-config python3-dev python3-pip \
   python3-requests qemu-kvm rsync rustc udev zstd
These is the list of required packages if you are using
Debian/Ubuntu, other distributions may have similar or equivalent
package names.
Preparing a sched-ext kernel
The development kernel of sched-ext is based on the latest bpf-next
branch.
The main reason is that we may want to start exploring the new eBPF
features as soon as possible, being sched-ext strictly connected to
eBPF.
To prepare a minimal sched-ext kernel that can run inside a virtme-ng
session do the following:
 $ git clone https://github.com/sched-ext/sched_ext.git linux
 $ cd linux
 $ vng -v --build --config  ~/.config/virtme-ng/kernel.config.bpf
 $ make headers
 $ cd -
All the sched-ext schedulers and tools are provided in a separate scx git repository.
To compile all the schedulers with the required tools and libraries
you can run the following command:
 $ git clone https://github.com/sched-ext/scx.git
 $ cd scx
 $ meson setup build -Dkernel_headers=../linux/usr/include
 $ meson compile -C build --njobs=1
If you want to recompile only a specific scheduler (i.e.,
scx_rustland) you can specify just the scheduler name that
you want compile via the meson compile command:
$ meson compile -C build scx_rustlandTest the scheduler inside
virtme-ng
First of all let’s define a bash helper that will help us to quickly
spawn a tmux session with a running sched-ext scheduler and a shell.
Add the following to your ~/.bashrc:
# Helper to test scx scheduler
scx() {
    sudo tmux new-session \; split-window -v \; send-keys -t 0 "$*" Enter
}
Now we can run the kernel that we have just recompiled using
virtme-ng:
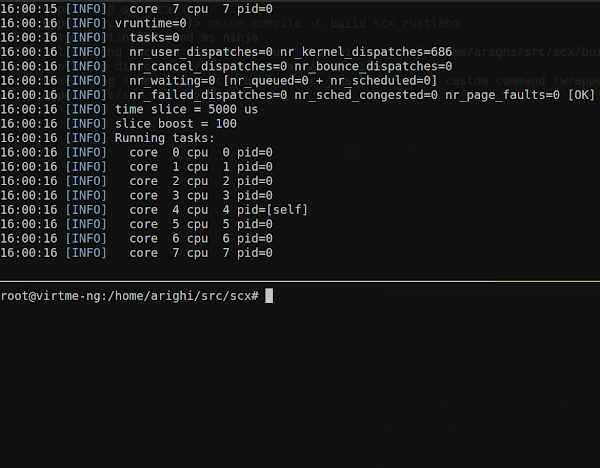
$ vng -vr ../linuxThen, inside virtme-ng, we can use the following command to run the
scx_rustland scheduler together with a shell session, that
can be used to run some tests or benchmarks:
$ scx ./build/scheds/rust/scx_rustland/debug/scx_rustland
Modify a scheduler:
scx_rustland
Now, let’s try to modify the scx_rustland scheduler as
following:
diff --git a/scheds/rust/scx_rustland/src/main.rs b/scheds/rust/scx_rustland/src/main.rs
index 33cf43b..59891ad 100644
--- a/scheds/rust/scx_rustland/src/main.rs
+++ b/scheds/rust/scx_rustland/src/main.rs
@@ -506,7 +506,7 @@ impl<'a> Scheduler<'a> {
                     // available.
                     let mut dispatched_task = DispatchedTask::new(&task.qtask);
                     if !self.builtin_idle {
-                        dispatched_task.set_cpu(NO_CPU);
+                        dispatched_task.set_cpu(0);
                     }

                     // Send task to the BPF dispatcher.
This change will force the scx_rustland scheduler to
dispatch all tasks on CPU #0.
This small change is obviously provided mostly for academic purposes,
but even a little change like this can have practical benefits in
certain scenarios.
Result
For example, let’s test this scheduler on a real system (my laptop)
and compare the power consumption of the default Linux scheduler vs the
modified scx_rustland.
We can start scx_rustland with the -u
option to make sure that all the tasks will be scheduled by the
user-space component that we have just modified:
$ scx ./build/scheds/rust/scx_rustland/debug/scx_rustland -uThen we can start a CPU-intensive stress test using stress-ng:
$ stress-ng -c 8 --timeout 30When measuring the average power consumption over a 30-second period
using turbostatthe
results show a notable difference between two schedulers:
                          Power usage
 ------------------------------------
 Default Linux scheduler |       7.5W
 Modified scx_rustland   |       3.6W
 ------------------------------------
This disparity can obviously be attributed to the different behavior
of the schedulers. With the modified scx_rustland
scheduler, all tasks are directed to CPU #0, leaving the other CPUs
largely idle. Consequently, the kernel can place these idle CPUs into a
low-power state. In contrast, the default Linux scheduler evenly
distributes the workload across all available CPUs, leading to higher
power consumption.
Although this modification massively impacts on performance, it
demonstrates the effectiveness of operating at the kernel scheduler
level and how easy it is via sched-ext. This experience highlights the
tangible benefits of fine-tuning kernel scheduler settings in real-world
scenarios using sched-ext.
The reason is that all the tasks are dispatched on CPU #0 with the
modified scx_rustlandso the other CPUs are basically idle
and the kernel can put them in a low-power state, while the default
Linux scheduler tries to distribute the workload equally across all the
available CPUs.
Despite the substantial impact on performance caused by this change,
this example demonstrates the effectiveness to operate at the kernel
scheduler level and the ease of implementing (and testing) such
modifications using sched-ext.
And, speaking from personal experience, I have actually used this
change while travelling when my laptop was running out of power. With
this simple change I was able to almost double the battery life of my
laptop and complete my work during the trip. 🙂
Conclusion
In this post I have shared my personal workflow to quickly run
experiments with sched-ext without the need to install a custom kernel,
highlighting the ease of conducting such experiments.
I hope this information can help all the potential developers
interested in improving their understanding of sched-ext through
experimentation.
GIPHY App Key not set. Please check settings